
With this option, each outlet has its own Stuart account. Each Stuart account should be named as per the Outlet name and should have a payment method attached which will have sufficient funds to pay for all the outlet’s deliveries. Follow these steps to set up a mapping account for your marketplace, and then a single Stuart account for your Outlet.
-
Set up your marketplace Stuart account, this will be used for mapping only and not booking deliveries.
-
Login to Redbox Management and navigate to your Marketplaces > Delivery Networks.
-
Click Add Delivery Network.
-
Name your delivery network, normally 'Stuart'.
-
Set your delivery charge settings in “Pay Delivery Charge to”. For individual Stuart accounts, this is commonly set to MERCHANT, which means any delivery charge made to the customer is included in the merchant/outlet payout.
-
Set the Delivery Network Type to MAPPING, which means this account will be used just for Stuart delivery areas mapping purposes.
-
For this setup it is normally the Outlet paying the subsidy, so do not set a subsidy on the marketplace settings in “Subsidise Deliveries By”, as this would be a marketplace subsidy.
-
Enter your Stuart account details, you can get your API Client ID and API Secret from the settings page in Stuart, under API Settings.
-
Select Create.
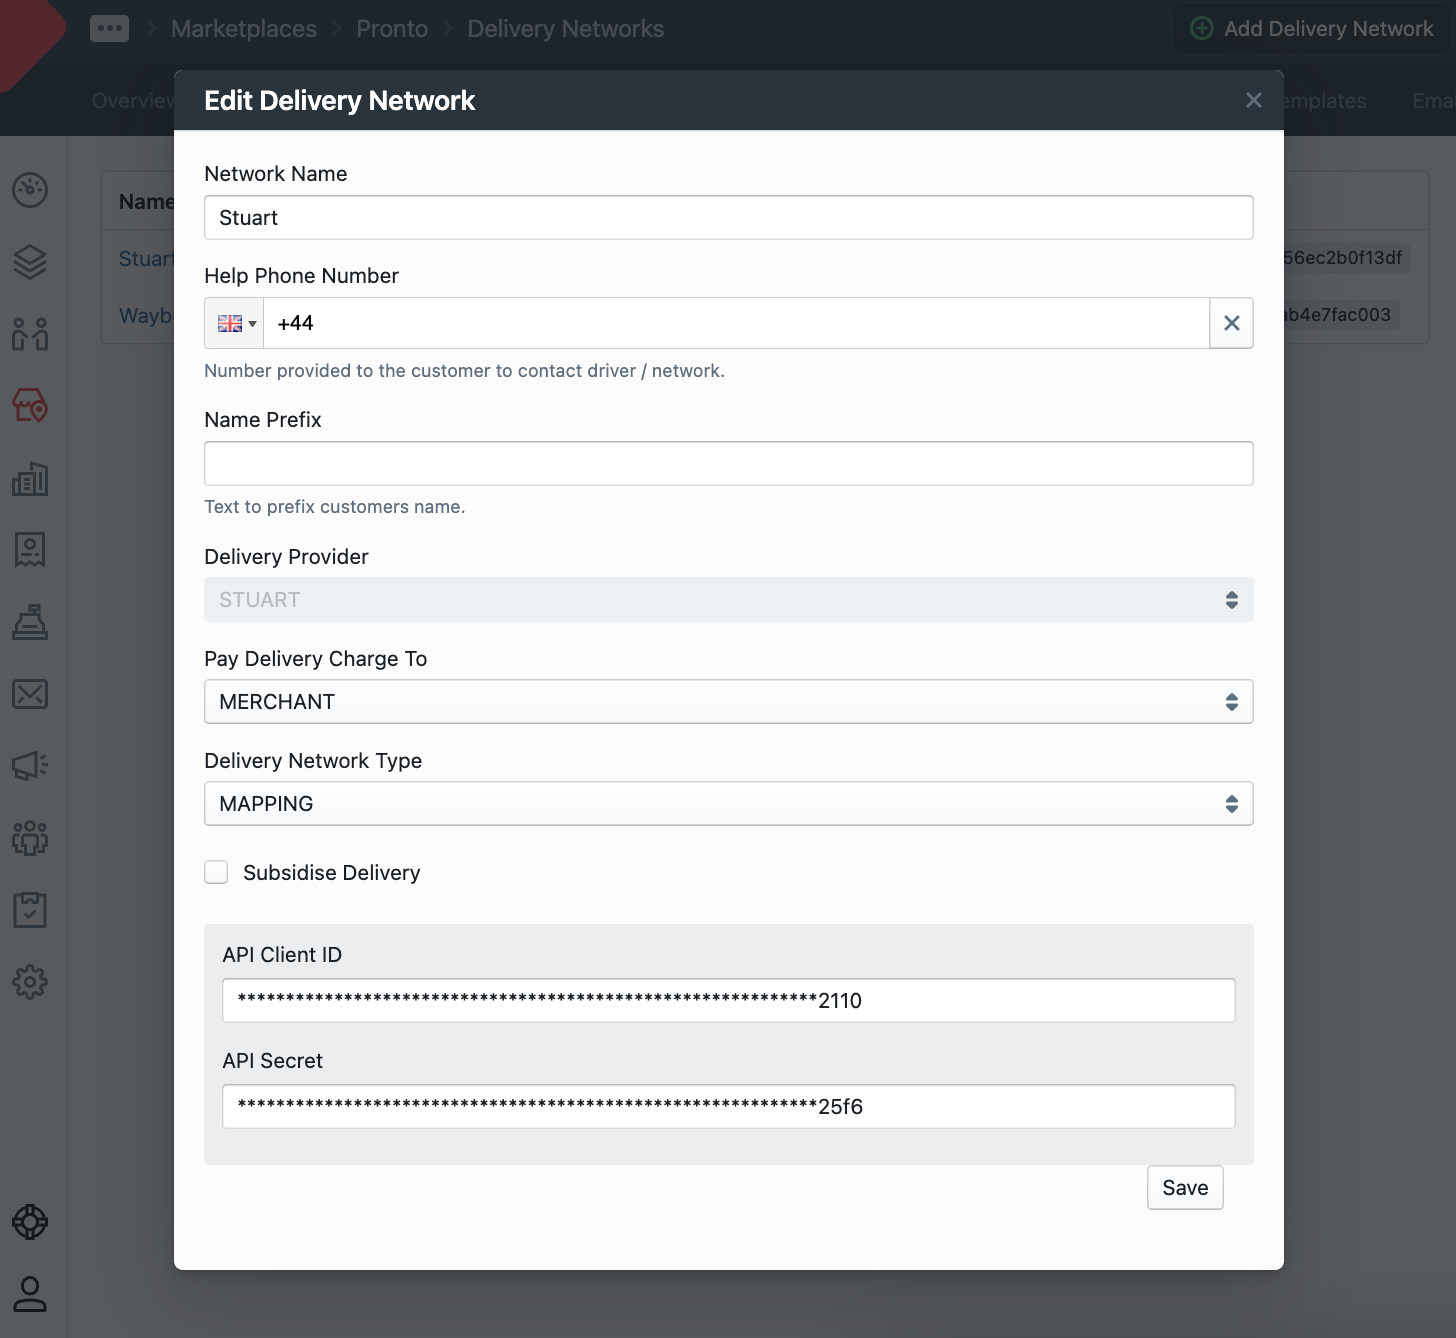
Edit Delivery Network window -
Redbox will integrate with your Stuart account for mapping only. The Webhook Status should say “NOT APPLICABLE” as this account is not used to make bookings.

-
Navigate to Delivery Zones in your marketplace settings in Redbox, and select Add Delivery Zone.
-
Add a Delivery Zone for Stuart, name it Stuart and select Save.
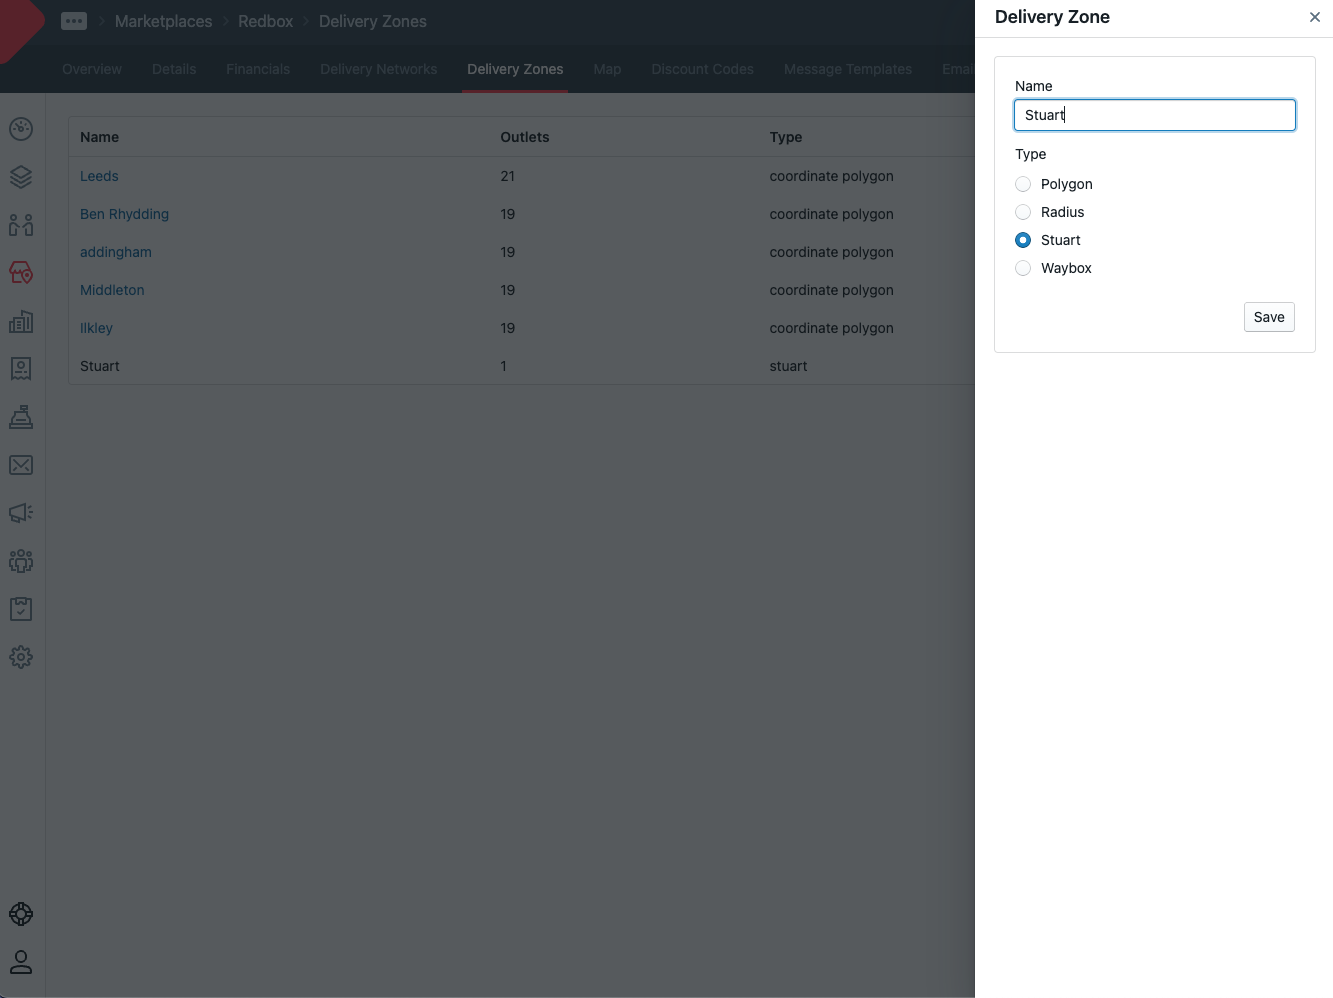
Add Delivery Zoned window -
You can now assign this delivery zone to any outlet in your marketplace that needs to use Stuart, along with the Outlet Stuart account details.
-
Navigate to your Outlet > Delivery.
-
Remove any existing delivery zones from your outlet.
-
Click Add Delivery Zone and select Stuart.
-
Set your delivery radius, this should be around 2.5 miles as if your outlet is delivering hot food.
-
Set your pickup notes, these are sent to Stuart as part of the booking and should be used for information that will help the driver pick up the order easily.
-
Set your Fallback Delivery Cost, this is displayed to the customer as a “Delivery From” cost if we do not have the exact location of the customer, the actual cost from Stuart displays later in the checkout.
-
Set a subsidy, this is the amount that the Outlet will be subsidising delivery by, and will be deducted from the value the customer pays for delivery. The Outlet will need to cover this cost.
-
Enter the API Client ID and API Secret for the Stuart account that you would like to attach to your Outlet, which your outlet can get from their Stuart account Settings.
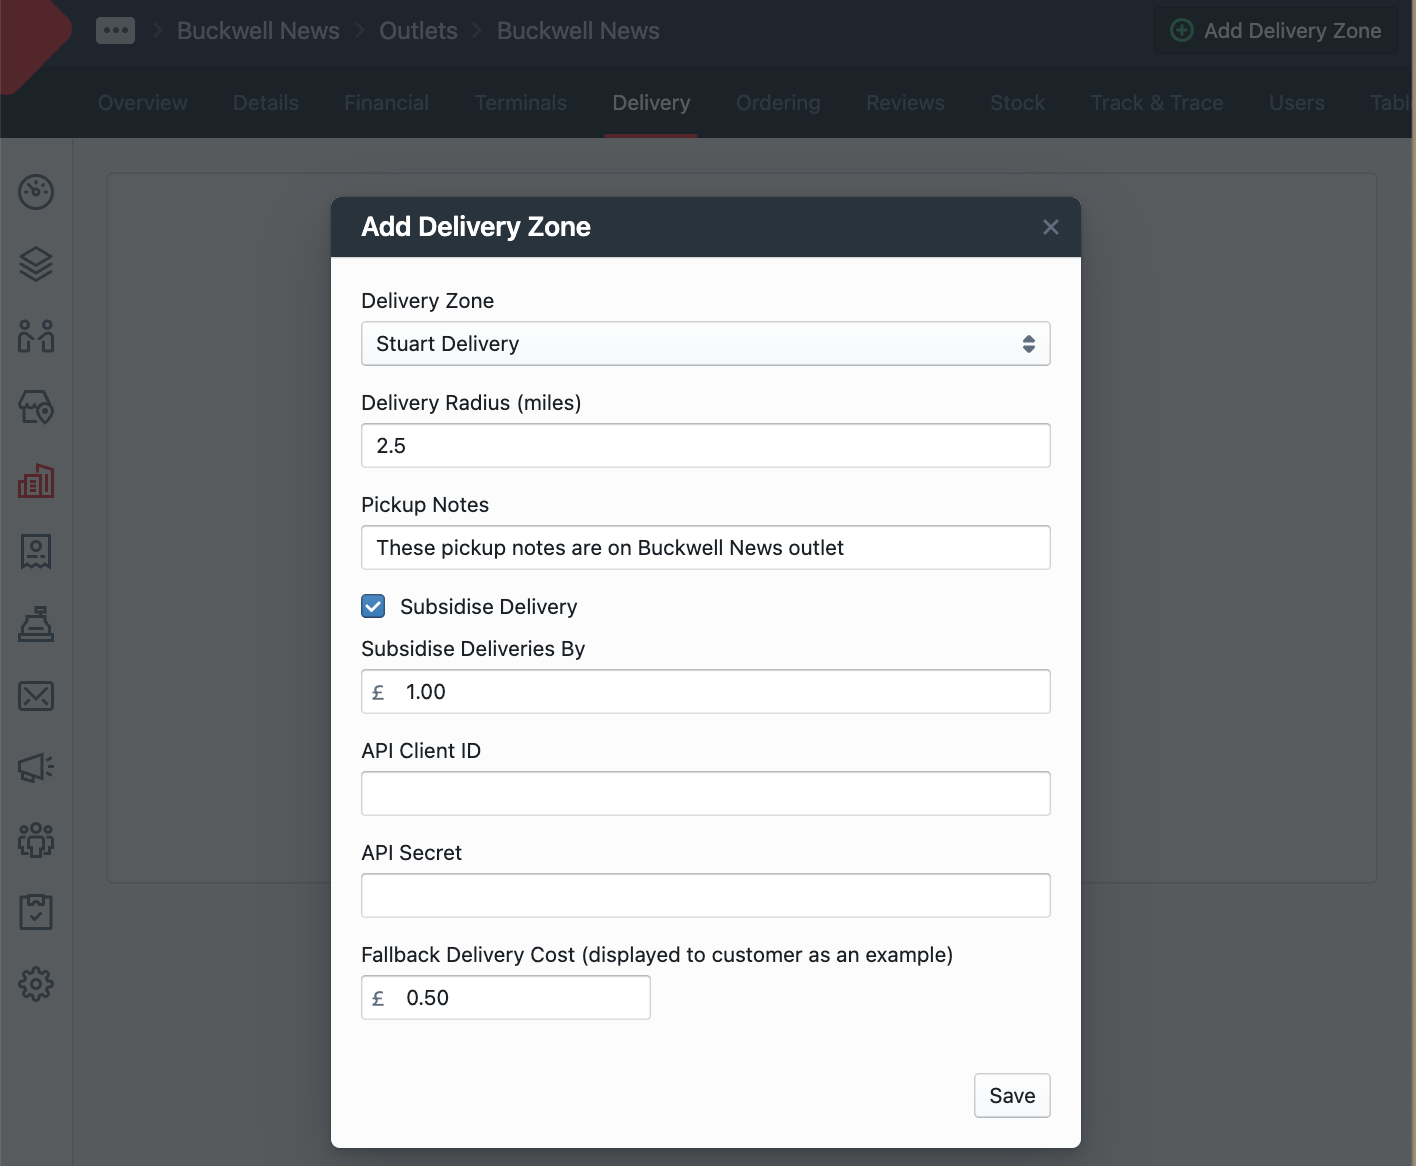
Add Delivery Zone window -
Select Save, the delivery zone will be saved and the Webhook Status should change to SUCCESS. If this step fails you can hover over the warning to find out why, the most common reason for this step to fail is that there is no payment method attached to the Outlet Stuart account. You should resolve any issues before testing an order for this Outlet.
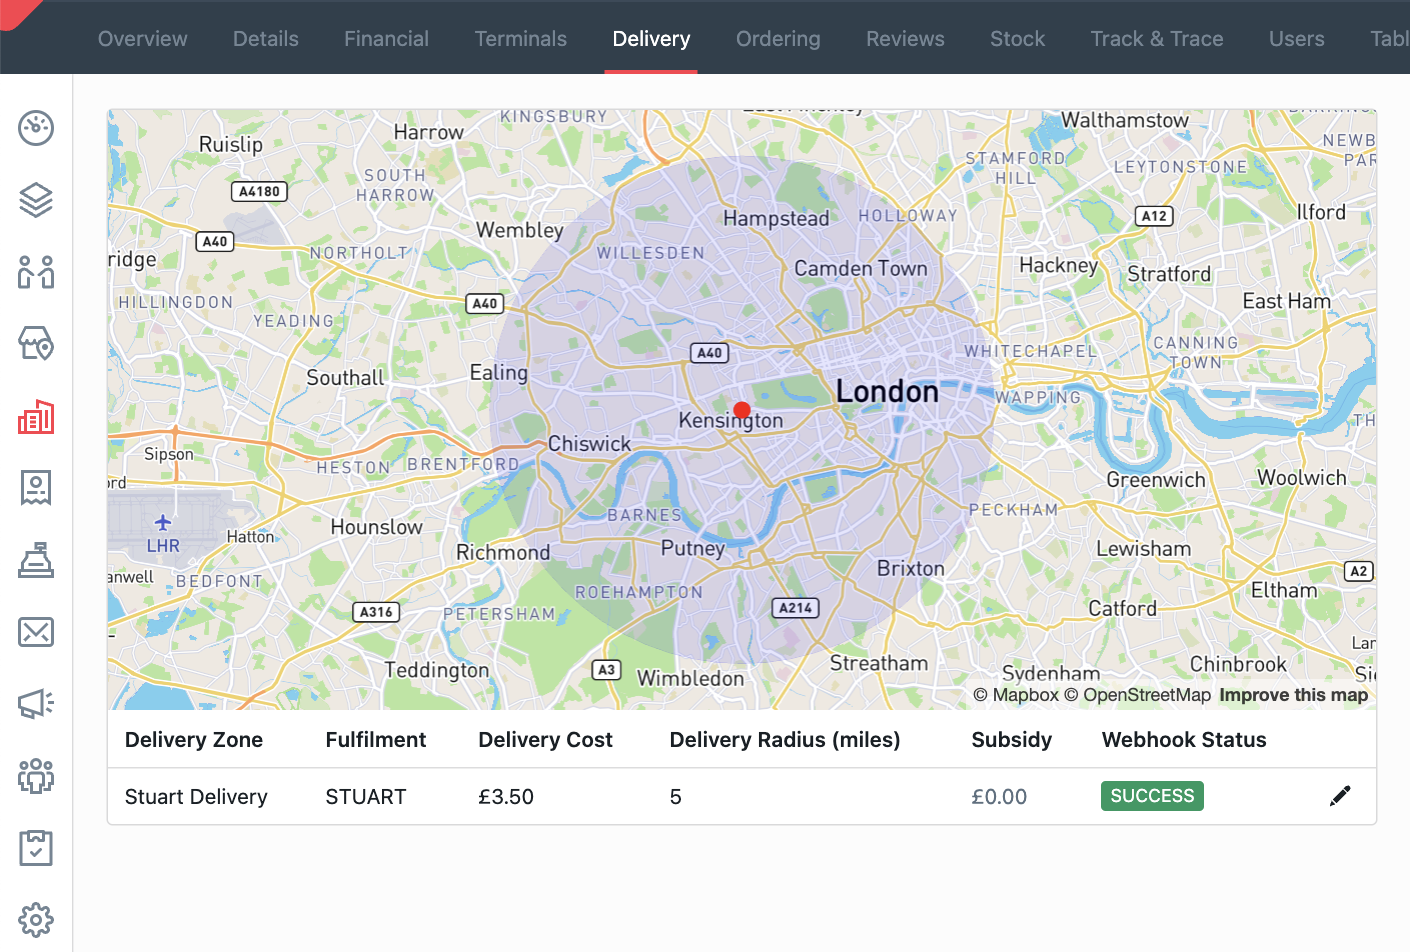
Stuart Delivery Zone -
To verify your outlet Stuart settings are correct navigate to the outlet on your ordering website and build a basket, you should see the expected Stuart delivery cost at checkout. If you would like to ensure the booking is working you can place a test pre-order, accept the order, and then cancel the order before a driver is assigned. You should see the Stuart status change to Pickup Booked and then Cancelled. In your Outlet Stuart account, you should see the booking in your upcoming bookings, and then it will move to your cancelled bookings.