
Requires Mobile 5.0+
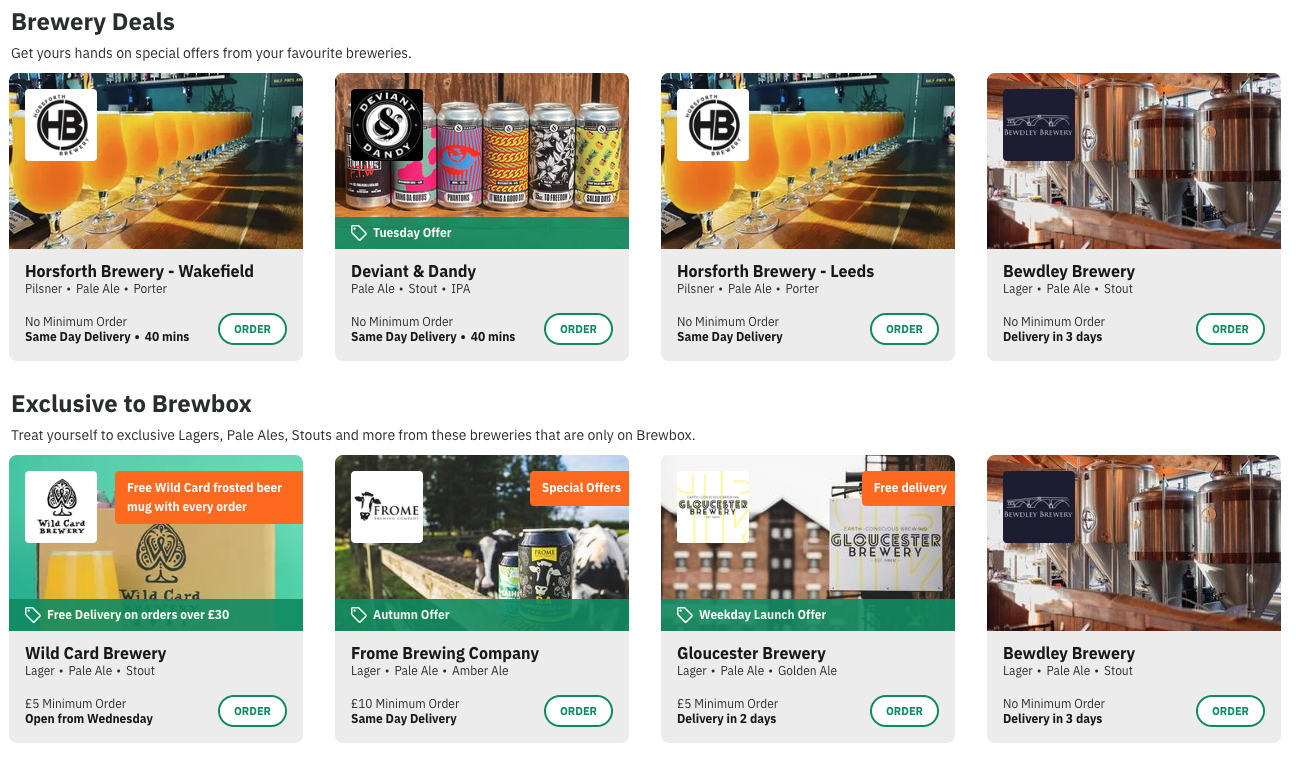
Highlight to customers key outlets and respond to seasonal trends with our business segments. This new feature enables you to curate a list of outlets to entice your customers to discover new businesses and products in your marketplace. You could use these for example to group grocery stores, to highlight ordering trends, or promote outlets offering Christmas offers. These segments are displayed on the home page and outlet list of Website and Mobile App.
As segments take up more real estate on the smaller app screens, you can choose which of your segments will be displayed on the customer ordering clients.
Business Segment Ideas
Creating an engaging business segment is a great way to boost traffic to your outlets. This can be done by customising your business segments. You can create multiple segments, and order how outlets will be displayed within the segment on the website/app. Here are some segment ideas to get you started:
-
New on ‘Your Marketplace Name’.
-
Only on ‘Your Marketplace Name’.
-
Top picks in your neighbourhood.
-
Meal Deals.
-
Fastest Delivery.
-
Offers for you.
-
‘Business Types’ near you - for example, Curry Houses near you.
-
Popular Brands.
Customising your Segments
You can customise segments according to a range of factors, such as by categories or outlets. You can also add link cards within segments, to push customers towards content or information you want them to see. Creating custom segments will help deliver engaging content and encourage traffic to these outlets.
You should set up multiple segments and these segments can be scheduled to allow them to be visible at particular times of the day or week, or only visible for a set time. You can also choose which segments will be displayed on the customer ordering app 5.0+, this is to reduce the number of segments displayed on the app’s outlet list where there is less space available.
How to Customise an Outlets & Link Card Segment
How to locate Segments: Redbox Management → Marketplaces → Select the required Marketplace → Segments
An Outlets and Link Card segment can be configured in a variety of ways. It can show just outlet cards, just link cards, or a mixture of both. To create an ‘Outlets and Link Card’ segment:
-
Select ‘Add Segment’.
-
Enter the name of the segment, this name will be displayed as the segment title on the website and app.
-
Select 'Outlet & Link Cards' as the segment type.
-
Select Create.
-
Open the segment.
-
Set up the segment with the following required variables:
-
Description - This will display below the segment name.
-
Limit Cards - This will allow the user to define the minimum and maximum number of cards (Outlet and Link) that will be visible on the segment.
-
Sorting - Control how the outlets are ordered within the segment, select either:
-
Distance - Shortest distance to the ordering postcode displays first.
-
Time - Shortest delivery time to the ordering postcode displays first.
-
Min. Order - Lowest minimum order displays first.
-
Open Status - Open outlets display first, followed by Preorder, followed by closed.
-
Alphabetical - Outlets are sorted alphabetically.
-
Random - Outlets are sorted randomly.
-
-
Display Options - Choose whether the cards will display on either mobile or website or both.
-
Display Settings:
-
Show special offer flags - Shows any special offer flags that are active.
-
Show discount labels - Shows any discount labels that are active.
-
Refine outlets by service component selection - When enabled, the outlets returned in the segment will be refined by the selections made on the service component. Eg. if ‘Delivery’ is selected, as well as ‘Now’ orders, only those outlets that offer delivery and accept ASAP orders will show.
-
Link title to segment index - When enabled, the customer can select the segment name to view all outlets associated with this segment.
-
-
Outlet Filters - These are the fields that define how the outlet cards appear in the segment.
-
Open / Closed Status:
-
All - Ignore - All outlets in the segment will display, regardless of their open status.
-
Open - Only those outlets that are open and accepting orders will display in the segment.
-
-
Attributes - Each segment will require variables to be selected to refine the outlets which will populate it, you can select one or multiple variables per segment. The following variables are available to refine the segment:
-
Categories - Outlets which contain or exclude (is not) the categories selected.
-
Outlet - Include (is) or exclude (is note) the specific outlets selected.
-
Discounts - Include (available) or exclude (unavailable) outlets which have discounts.
-
Featured Outlets - Include (is featured) or exclude (is not featured) featured outlets.
-
-
-
-
Link Cards - These are the fields that define how the link cards appear in the segment.
-
Sorting - Control how the link cards are ordered within the segment, select either:
-
Random - Link cards are displayed randomly.
-
Position - Link cards are displayed in a defined order. Link cards can be reordered within their list by using the up and down arrows.
-
-
Add Link Card - Add existing Link Cards to the segment, from the list available in the drop down.
-
Create Link Card - Create a new Link Card to add to the segment. For instructions on creating Link Cards, see our Link Cards guide.
-
-
Schedule - Fields that allow you to control when the segment appears.
-
Availability Date Range - Set the date range of when this segment will be available, for example for the Christmas period only.
-
Always Available - For use when your menu is always available (default).
-
Scheduled - For when your menu is only available for a limited date range, eg. Christmas menu. Use the date picker to set a start and end date.
-
-
Availability Times - Schedule your segment to be shown between certain times on certain days, eg. a Thursday lunchtime special. Select ‘Add New Time’ to add multiple days.
-
-
Select Save to save the segment and close the window.
How to Preview your Segment
-
Once on the ‘Segments’ page, select the three dots.
-
Select ‘Preview’.
This preview will display all the outlets expected to return in the segment in an outlet list style view, it will not display any link cards associated with the segment.
You can also show special offer flags and/or discount labels, this can be useful depending on the segment type you are creating i.e. a segment for offers.
How to Customise a Category-Type Segment
How to locate Segments: Redbox Management → Marketplaces → Select the required Marketplace → Segments
-
Once on the ‘Segments’ page, select ‘Add Segment’.
-
Enter the name of the segment, this name will be displayed as the segment title on the website and app when not hidden.
-
Select 'Category' as the segment type.
-
Select ‘Create’.
-
Open the segment.
-
Set up the segment with the following required variables:
-
Description - This will display below the segment name.
-
Sort by - This is the order in which the outlets will display within the segment.
-
Category Tags - These will populate the segment.
-
Segment Schedule - This will allow the user to set the availability of the segment.
-
-
Select 'Save'.
How to Manage Where your Segments are Displayed
How to locate Segments: Redbox Management → Marketplaces → Select the required Marketplace → Segments
-
Once on the ‘Segments’ page, select the three dots.
-
Select move up or move down.
Featured Outlets Default Business Segment
The default business segment only applies to the customer ordering on the Web. The default featured outlets segment does not display on the ordering apps.
If you do not set up any business segments, your website will display a default segment named ‘Now on [Your Marketplace Name]’, this is made up of all outlets which have been set to be ‘featured’ in Redbox Management. The default segment will not apply any sorting and will display the outlets in a randomised order, changing each time the page is loaded.
How to Populate the Default Featured Outlets Business Segment
How to locate Outlet Details: Redbox → Businesses → Select the required business → Outlets → Select the required outlet → Details
Once on the ‘Outlet Details’ page:
-
Scroll down to the ‘Promote’ section.
-
Enable ‘Feature on Homepage’.
-
Select ‘Save’.
To populate the default business segment, navigate to the ‘Promote’ feature on the Outlet Details page mentioned above.
Repeat this process for each of the outlets which you would like to be displayed within the default business segment.
Please provide each of the outlets with the default segment with a cover image, see below ‘How to add a cover image to an outlet’.
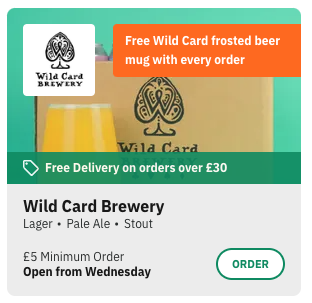
Cover Images for Outlets
To create an engaging and eye-catching business segment, your outlets will need to have a cover image, here are a few pointers for a great cover image
-
Works well with the business logo.
-
A good representation of your brand.
-
A clear image, which is not blurry or cropped.
-
Smaller than 1MB in size.
-
72 DPI (web resolution not print)
If you need to resize your image to under 1MB, you must maintain the aspect ratio so your image is not stretched. For example, if your image is landscape, you could reduce the image's width to around 1200 pixels, but you should let your resizing program calculate the height. Most programs will indicate what file size the image will be before you resize, which means you can adjust the dimensions until the file is just under 1MB. If your file is still too large at 1200 wide, try reducing this to 1000 or 800 pixels wide, but ensure the height is not manually set. Before setting any dimensions, always check your DPI is 72 as this will affect file size and dimensions.
How to Add a Cover Image to an Outlet
How to locate Outlet Details: Redbox → Businesses → Select the required business → Outlets → Select the required outlet → Details
Once on the Outlet Details page:
-
Under the ‘Menu’ section, scroll to the ‘Cover Image’ section
-
Select ‘Browse’.
-
Add the image.
-
Select ‘Save’.