
How to locate the DNS page: Redbox Management → Marketplaces → Select a Marketplace → DNS
If you use Fasthosts for your domain name server provider you can use this guide to setup your Redbox marketplace domain name.
To complete your DNS configuration - you will need to have the following web pages open:
-
Fasthosts.
-
The DNS page (see above directions).
-
Log on to your Fasthosts website.
-
In the left Navigation pane, select ‘Domain Names’.
-
In the search box, enter the domain name of the marketplace.
-
select DNS to the right of the domain name.
-
On this page, you will find various types of Records. We will be using A Record, CNAME Record and MX Record.
-
First, you will need to select ‘Add CNAME Record’.

-
On the DNS page, Under Website DNS, copy the first CNAME record:
a. From the Host column, copy all the text and paste this into the ‘Host Name’ field on Fasthosts.
b. From the Value column, copy all the text and paste this into the ‘Points To’ field on Fasthosts.
c. Select ‘Save’. -
Repeat steps 6 and 7 a, b and c for the second CNAME record under Website DNS.
-
Next, on Fasthosts, select ‘ADD A RECORD’.

-
On the DNS page, Under Website DNS, copy the first A record Value.
-
Return to Fasthosts and paste this value into the ‘Points to’ field. Leave the ‘Host name’ as it is (this is usually blank).
-
Select ‘Save’.
-
Repeat steps 9, 10, 11 and 12 again for the second A Record value under Website DNS on the DNS page.
-
Next, on Fasthosts, select ‘ADD CNAME RECORD’.
-
On the DNS page, Under Email DNS, copy the first CNAME record.
a. From the Host column, copy all the text and paste this into the ‘Host Name’ field on Fasthosts.
b. From the Value column, copy all the text and paste this into the ‘Points To’ field on Fasthosts.
c. select ‘Save’. -
Repeat steps 14 and 15 a, b and c for the second and third CNAME records under Email DNS.
-
Next, on Fasthosts, select ‘ADD TXT RECORD’.
-
On Redbox → Marketplace → DNS, Under Email DNS, copy the TXT record.
a. From the Host column, copy all the text and paste this into the ‘Host Name’ field on Fasthosts.
b. From the Value column, copy all the text and paste this into the ‘Points To’ field on Fasthosts.
c. Select ‘Save’. -
Next, on Fasthosts, select ‘ADD MX RECORD’
-
On the DNS page, Under Email DNS, copy the MX record.
a. From the Value column, copy all the text and paste this into the ‘Points To’ field on Fasthosts.
b. In the ‘Priority’ field, enter ‘10’.
c. Select ‘Save’. -
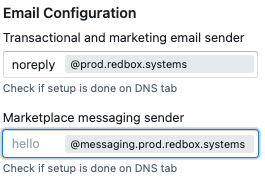
If you would like to enable the Messaging facility on Redbox please complete the next steps. If you would like to do this at a later point, the Website and Email are now set up.
-
To enable Messaging - on the DNS page, Under Messaging DNS, select ‘Define Messaging Sender’, and you will be redirected to the Messaging Template tab.
-
On the right, input the sender name you would like to use for Messaging from Redbox - eg. hello or info, all messages will be sent from this sender.
-
Select ‘save’
-
On the top navigation, return to the DNS page. Messaging DNS will now be populated with the Records required.
-
Next, on Fasthosts, select ‘ADD MX RECORD’.
-
On the DNS page, Under Messaging DNS, copy the MX record.
a. From the Value column, copy all the text and paste this into the ‘Points To’ field on Fasthosts.
b. In the ‘Priority’ field, enter ‘10’.
c. Select ‘Save’ -
Next, on Fasthosts, select ‘ADD CNAME RECORD’.
-
Next on the DNS page, Under Messaging DNS, copy the first CNAME record.
a. From the Host column, copy all the text and paste this into the ‘Host Name’ field on Fasthosts.
b. From the Value column, copy all the text and paste this into the ‘Points To’ field on Fasthosts.
c. Select ‘Save’. -
Repeat steps 28 and 29 a, b and c for the second and third CNAME records under Messaging DNS.
Existing marketplaces with Messaging DNS set up already completed, please follow steps 33 to 34 to include the additional Messaging records following Redbox Manaintence Release 6.7.3
-
Next, on Fasthosts, select ‘ADD TXT RECORD’.
-
On the DNS page, Under Messaging DNS, copy the TXT record.
a. From the Host column, copy all the text and paste this into the ‘Host Name’ field on Fasthosts.
b. From the Value column, copy all the text and paste this into the ‘Points To’ field on Fasthosts.
c. Select ‘Save’ -
Now you have completed the configuration for this marketplace.