
How to locate Orders: Redbox Management → Orders
Orders can be managed in a variety of ways to best suit a business’ needs.
Most businesses will use their terminal to manage orders and will use the ‘Orders’ tab in Redbox Management to view orders in more detail. However, you can also manage some parts of the ordering process using the ‘Order details’ window in the ‘Orders’ tab.
Below explains how to manage orders using the ‘Orders’ section in Redbox Management.
There are two other methods of managing orders. Visit our guides to find out more:
-
Managing Orders on Terminals - This guide will provide instructions on managing orders using a terminal.
-
Managing Orders in Virtual Terminal - This guide will provide instructions on managing orders using the 'Virtual Terminal' tab in Redbox Management.
In the ‘Orders’ section you can:
-
Accept and reject orders.
-
View the time the orders were placed.
-
Access customer details.
-
See the last order update.
-
View payment details.
-
Review the delivery network status when delivery is managed by a third party.
When managing orders, it’s important to understand when orders will be automatically rejected. See our Automatic Rejection of Pending Orders guide for further information.
Viewing the Main Orders Screen
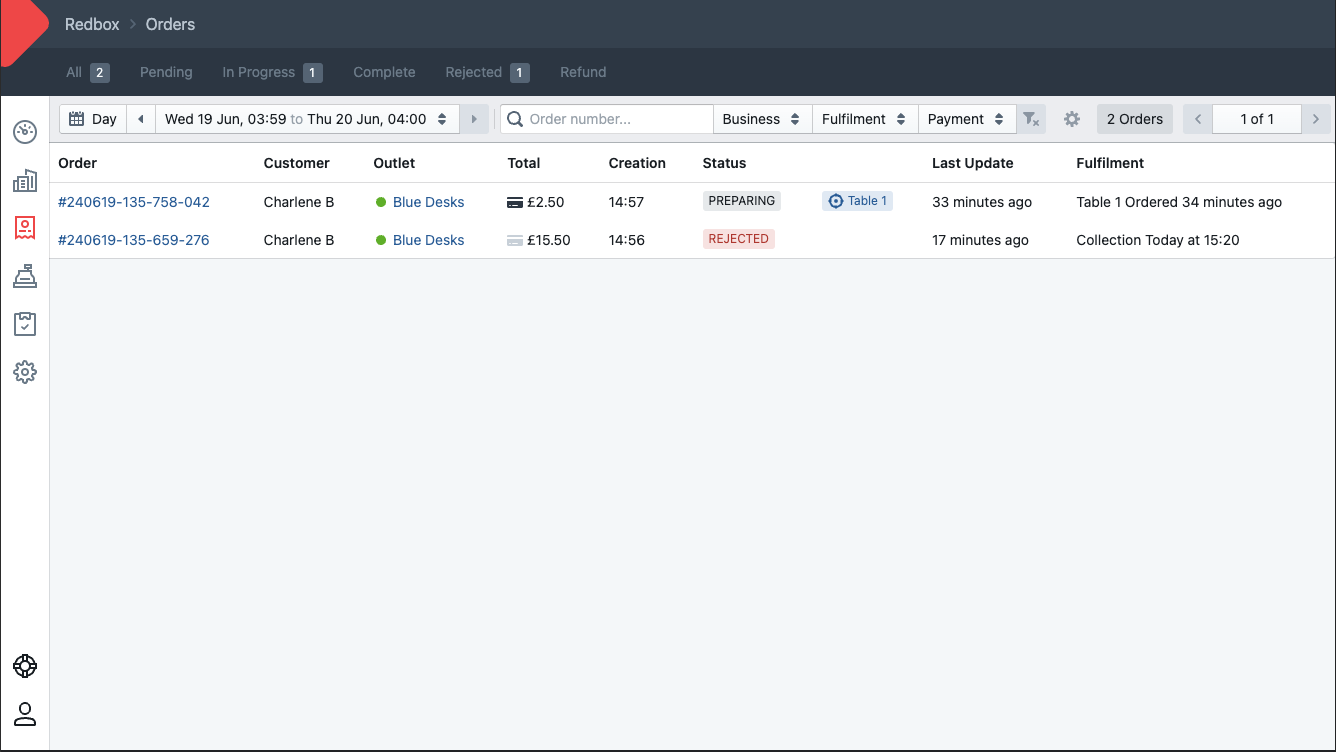
Within the ‘Orders’ section, there are a number of tabs along the top toolbar:
-
All - All the orders (default setting).
-
Pending - All pending orders.
-
In Progress - All accepted orders that are currently in progress i.e being prepared.
-
Complete - All completed orders.
-
Rejected - All rejected orders.
-
Refund - All refunded orders.
Orders can be filtered in a number of ways:
-
Time periods
-
Day
-
Week
-
Custom
-
-
Order number
-
Marketplace (Only visible for Marketplace level users)
-
Fulfilment
-
Network Delivery
-
Delivery
-
Collection
-
Table Service
-
-
Payment
-
All
-
Card
-
Cash
-
Using the cog, you can enable/disable the following:
-
Mute Alarms - This mutes alarms when a new order is received.
-
Use Exact Time - Enabling this toggle shows the exact time in the ‘Last Update’ column, rather than rounding to the closest hour.
-
Display Delivery Window - Enabling this toggle adds an additional ‘Delivery Window’ column on the main ‘Orders’ screen.
Managing Orders
Managing your orders is the most important part of any business, here is some information to get you started with managing orders via management:
-
When an order is placed via the ordering website or app, the order will be displayed on the ‘Orders’ list.
-
All order statuses will be Pending until they have been accepted or rejected.
-
When a card order is placed with an outlet we create an authorised but uncaptured charge against the customer's card through Stripe. This is done to ensure the card is valid and has sufficient funds before we send the order to the outlet. The order will show as Pending until the outlet accepts or rejects the order.
-
If the order is accepted we capture the charge through Stripe and the order status changes to Preparing .
-
If the order is rejected then we return the un-captured charge to the customer through Stripe and the order status is changed to rejected .
-
If the order is to be charged to a card we will return the un-captured charge to the customer and the order status will change to rejected .
-
Cash orders have no pre-payment taken, so no refunds need to be made and the order will show as rejected .
-
Rejected orders are not included in the transactions report as there is no completed transaction associated with those orders.
Accepting Orders
-
Select the order, which will open the ‘Order Details’ window, and select ‘Accept’.
-
Your order will then be marked as Preparing .
-
An accepted order notification will be sent to the customer.
Rejecting Orders
-
Select the order, which will open the ‘Order Details’ window, and select Reject.
-
Your order will then be marked as Rejected .
-
A rejected order notification will be sent to the customer.
Adding Time to Orders
A user can add 15 minutes, 30 minutes, 45 minutes or 60 minutes to the order. Once time has been added to the order, the order window/slot will be updated.
-
Select the order, which will open the ‘Order Details’ window. Then either:
-
If the order has not been accepted yet, select ‘Accept’, the modal will allow the user to add time.
-
If the order has been accepted, select ‘Add Time’, the modal will allow the user to add time.
-
-
An order update notification will be sent to the customer.
Cancelling Orders
Only orders which have been accepted can be cancelled.
-
Select the order, which will open the ‘Order Details’ window, and select ‘Cancel’.
-
Your order will then be marked as Order Failure refund .
-
A cancel order notification will be sent to the customer.
Ready Orders
Orders which are ready for collection or are ready for delivery should be marked as ready.
-
Select the order, which will open the ‘Order Details’ window, and select Ready.
-
Your order will then be marked as Ready .
-
A ready order notification will be sent to the customer.
Complete Orders
Orders which have been delivered or collected should be marked as ‘Complete’. Once completed the order will be move to the ‘Complete’ tab.
-
Select the order, which will open the ‘Order Details’ window, and select ‘Complete’.
-
Your order will then be marked as complete .
-
A complete order notification will be sent to the customer.